Extending create-react-app to make your own React CLI Scaffolding Tool
At RateSetter, we've recently spun up a bunch of new React projects. Our React projects use create-react-app with specific config for the app to be deployed and hosted by our platform.
To spin up a new frontend project, teams would often clone preexisting React projects, delete irrelevant files and update files with the new name of the app. This resulted in problems such as git history not being cleaned from the cloned project, teams wasting time cleaning up the project and errors arising from when config wasn't correctly updated for the new project.
I saw a real need for a frontend project scaffolding tool. The tool needed to run create-react-app and then augment it with all the configuration and templates necessary to get a frontend app up and running at RateSetter.
I've never made a CLI tool before this, so it was an excellent opportunity to learn how to do so. This article focuses on how I built it, and what I learned from building it.
Building the Scaffolding Tool
I've created a GitHub repository for the scaffolding tool. It might help to have this open while following this article:
 GitHub
Feel free to clone, fork, star or suggest improvements for it :).
Overview
I designed the CLI tool to have the following flow:
- Ask the user for the app name (must follow
create-react-app's naming convention) - Present the user with a list of available front-end libraries/frameworks
- Present a list of options that the user can choose from to augment their frontend application with
- Run
create-react-appfollowed by: - Installing additional NPM dependencies
- Adding/modifying
package.jsonentries - Adding templates
This article will focus on creating the CLI tool by augmenting create-react-app - a very popular React scaffolding too. Since we are pragmatic engineers, we will be structuring our CLI in an extensible manner to allow future support of other frontend libraries/frameworks (Angular and React).
For the React side of the tool, we're going to provide the user with three options they can augment their React app with:
- Adding Redux and Redux Saga
- Adding a Mock API server. This will be a simple Node/Express server that can run alongside the app to provide mock API responses
- Adding static code analysis tools (Prettier, TsLint, StyleLint)
Scaffold Dependencies
I've uncreatively called the tool: create-frontend-app. Create that directory and initialise Git (git init) and NPM (npm init). Then, add the following project structure:
.gitignore
package.json
index.js
react/
    config/
        mockApi/
            templates/
                ...
            index.js
        redux/
            templates/
                ...
            index.js
        staticCodeAnalysis/
            index.js
    reactApp.js
We will need to install three Node packages:
- inquirer - provide our users with an interactive CLI interface
- ora - loading spinner to display while our CLI is running commands
- fs-extra - extension utils to
fsthat helps make our CLI code more concise - colors - to provide our users with a colourful CLI experience :)
In frontend-scaffold-cli run:
npm install --save inquirer ora fs-extraOption Config Setup
As previously mentioned, we're going to allow the user to choose to add up to three optional augmentation options:
- Adding Redux/Redux Saga
- Adding static code analysis tools (Prettier/StyleLint/EsLint)
- Adding a mock API server
My aim for this tool was to have one config file for each augmentation option that that drives what each will provide the app. I've created the following (TypeScript) schema of how I thought I could best handle the requirement of:
- Installation of additional NPM dependencies
- Additional/modified
package.jsonentries - Additional/updated project files
interface IConfig {
	name: string;
	description?: string;
	dependencies: string[],
	devDependencies: string[],
	packageEntries: Array<{
    	    key: string;
            value: string
	}>,
	templates: Array<{
            path: string;
            file: IFile;
	}>
}nameis the name of the config.descriptionis a description of what selecting this augmentation will provide to the user. It will be output to the user and asked as a question.dependencies/devDependenciesare a list of NPM packages that will be installed into the projectpackageEntriesis a key value pair list which will be added to the project'spackage.jsontemplatesare a list ofpath/fileentries. The CLI will iterate through each, create a new file using the specified template at the path location.
The config I've created for the Mock API option looks like:
const apiIndex = require("./templates/apiIndex");
const mockController = require("./templates/mockController");

module.exports = {
  name: "withMockApi",
  question: "Do you want to include a local mock API using Node and Express?",
  dependencies: [],
  devDependencies: ["express", "body-parser"],
  packageEntries: [
    { key: "proxy", value: "http://localhost:9001" },
    {
      key: "scripts.dev",
      value: "run-p start mock-api",
    },
  ],
  templates: [
    { path: "mock-api/index.js", file: apiIndex },
    { path: "mock-api/mockController.js", file: mockController },
  ],
};
You'll notice that we're importing apiIndex from "./templates/apiIndex". This is a template file that should be added into the project and looks like:
module.exports = `
const express = require('express');
const app = express();
const bodyParser = require('body-parser');
const port = 9001;

app.use(bodyParser.json());
app.use(bodyParser.urlencoded({ extended: true }));

const mockController = require('./mockController');

app.get(
  '/mock-endpoint',
  mockController.mockGetEndpoint
);

app.post(
  '/mock-endpoint',
  mockController.mockPostEndpoint
);

app.listen(port, () => console.log('Example app listening on port: ' + port + '!'));
`;
It simply exports the contents of the template as a string. This string content will be used to construct template files in projects created by the tool. All the other template files have similar formats, but I won't display them here because there are too many!
You can see all the config files for the other two options in my GitHub repo:
- Redux/Redux Saga: https://github.com/HarveyD/create-frontend-app/tree/master/react/config/redux
- Static Code Analysis: https://github.com/HarveyD/create-frontend-app/tree/master/react/config/staticCodeAnalysis
We then need to create an index.js file in root of /config to import and export the three config files:
const withStaticCodeAnalysis = require("./staticCodeAnalysis");
const withRedux = require("./redux");
const withMockApi = require("./mockApi");

module.exports = [withStaticCodeAnalysis, withRedux, withMockApi];
The CLI Entry-point
With our config all sorted, we now have to construct the base of our CLI. This entry point needs to extract two pieces of information from our user: the desired app name and framework/library. In our entry point (index.js) add the following:
#!/usr/bin/env node
const inquirer = require("inquirer");
const reactApp = require("./react/reactApp");

const askAppQuestions = () => {
  const questions = [
    {
      type: "input",
      name: "appName",
      message:
        "What name do you want to give your app (should be in kebab case format: `your-app-name`)?"
    },
    {
      type: "list",
      name: "appType",
      message: "What framework do you want to use?",
      choices: ["react", "angular", "vue"]
    }
  ];
  return inquirer.prompt(questions);
};

const appDict = {
  react: reactApp
};

const run = async () => {
  const answer = await askAppQuestions();
  const { appName, appType } = answer;

  // Todo: Perform some validation on appName here to make sure it's kebab case
  if (!appName || appName.length <= 0) {
    console.log(`Please enter a valid name for your new app.`.red);
    return process.exit(0);
  }

  const app = appDict[appType];

  if (!app) {
    console.log(
      `App type: ${appType} is not yet supported by this CLI tool.`.red
    );
    return process.exit(0);
  }

  const appDirectory = `${process.cwd()}/${appName}`;

  const res = await app.create(appName, appDirectory);

  if (!res) {
    console.log("There was an error generating your app.".red);
    return process.exit(0);
  }

  return process.exit(0);
};

run();
Here we're using inquirer to prompt users to:
- Enter an app name
- Select an app type from 3 options: React, Angular and Vue
It'll find the next part of the CLI tool using the app type selected, which it'll pass the current directory and app name.
As you can see, appDict only has an entry for React at the moment as we're only focusing on React in this article.
React CLI
If React is selected,index.js will run the function in react/reactApp.js with the name and directory of our app. Let's build it out.
react/reactApp.js is a relatively big file, so we'll be breaking it down. First let's add the dependencies required:
require("colors");
const shell = require("shelljs");
shell.config.silent = true;
const inquirer = require("inquirer");
const fse = require("fs-extra");
const set = require("lodash.set");
const ora = require("ora");

const reactConfigList = require("./config");Now, we create the default function to be exported by reactApp.js:
module.exports = async (appName, appDirectory) => {
  const selectedConfigList = await askQuestions(appName, appDirectory);

  await createReactApp(appName);
  await installPackages(selectedConfigList);
  await updatePackageDotJson(selectedConfigList);
  await addTemplates(selectedConfigList);
  await commitGit();

  console.log(
    `Created your new React app with settings: ${selectedConfigList
      .map(_ => _.name)
      .join(", ")}. cd into ${appName} to get started.`.green
  );

  return true;
};This function is performing a number of steps. Each step is separated out into a function and returns a promise (hence why we're awaiting them). We'll flesh out the functions one at a time.
askQuestions
The first thing we need to do is to iterate through our list of augmentation options and ask the user if they want to include it within their app.
const askQuestions = async () => {
  const selectedConfigList = [];

  const questions = reactConfigList.map(config => ({
    type: "list",
    name: config.name,
    message: config.question,
    choices: ["yes", "no"]
  }));

  const answers = await inquirer.prompt(questions);

  reactConfigList.forEach(config => {
    const matchingAnswer = answers[config.name];

    if (matchingAnswer && matchingAnswer === "yes") {
      selectedConfigList.push(config);
    }
  });

  return selectedConfigList;
};Here we're transforming our list of configs into a list of inquirer questions. We then ask the user each question sequentially. We then return a list of options that were selected as yes. This list is passed to subsequent steps in the CLI.
createReactApp
The most essential function of our CLI tool is this function! We need to run create-react-app to have something we can augment!
const createReactApp = appName => {
  const spinner = ora("Running create-react-app...").start();

  return new Promise((resolve, reject) => {
    shell.exec(
      `npx create-react-app ${appName}`,
      () => {
        const cdRes = shell.cd(appName);

        if (cdRes.code !== 0) {
          console.log(`Error changing directory to: ${appName}`.red);
          reject();
        }

        spinner.succeed();
        resolve();
      }
    );
  });
};We're utilising ora to show the user a spinner while create-react-app is doing it's thing.
We utilise shelljs to execute npx, which simply runs create-react-app with the app name provided to the CLI tool in index.js. This is wrapped in a Promise due to shelljs being asynchronous, but only providing a callback to indicate its completion.
Once it's done we need to change the current directory to this freshly created React app, stop the spinner and resolve our Promise.
installPackages
This function installs all the dependencies and dev dependencies our augmentations require.
const installPackages = async configList => {
  let dependencies = [];
  let devDependencies = [];

  configList.forEach(config => {
    dependencies = [...dependencies, ...config.dependencies];
    devDependencies = [...devDependencies, ...config.devDependencies];
  });

  await new Promise(resolve => {
    const spinner = ora("Installing additional dependencies...").start();

    shell.exec(`npm install --save ${dependencies.join(" ")}`, () => {
      spinner.succeed();
      resolve();
    });
  });

  await new Promise(resolve => {
    const spinner = ora("Installing additional dev dependencies...").start();

    shell.exec(`npm install --save-dev ${devDependencies.join(" ")}`, () => {
      spinner.succeed();
      resolve();
    });
  });
};Here, for each selected augmentation provided from askQuestions, we're grabbing the list of NPM dependencies it requires and installing them! We use shelljs to run the NPM command to install the dependency! We perform the same thing for dev dependencies.
updatePackageDotJson
This function updates package.json by adding entries, or modifying them.
const updatePackageDotJson = (configList) => {
  const spinner = ora("Updating package.json scripts...");

  const packageEntries = configList.reduce(
    (acc, val) => [...acc, ...val.packageEntries],
    []
  );

  return new Promise((resolve) => {
    const rawPackage = fse.readFileSync("package.json");
    const package = JSON.parse(rawPackage);

    packageEntries.forEach((script) => {
      // Lodash `set` allows us to dynamically set nested keys within objects
      // i.e. scripts.foo = "bar" will add an entry to the foo field in scripts
      set(package, script.key, script.value);
    });

    fse.writeFile("package.json", JSON.stringify(package, null, 2), function (
      err
    ) {
      if (err) {
        spinner.fail();
        return console.log(err);
      }

      spinner.succeed();
      resolve();
    });
  });
};First we grab all the entry modifications we need to perform from our selected config list. Then we use fse to grab the existing contents of package.json and parse it. We loop over the list of entries, and use lodash set to output the key value pair in package.json. We then use fse to overwrite the old package.json with the new, mutated package.json.
addTemplates
This function adds the template files associated with the augmentation option to our new project.
const addTemplates = configList => {
  const spinner = ora("Adding templates...");

  const templateList = configList.reduce(
    (acc, val) => [...acc, ...val.templates],
    []
  );

  return new Promise(resolve => {
    templateList.forEach(template => {
      // outputFile creates a directory when it doesn't exist
      fse.outputFile(template.path, template.file, err => {
        if (err) {
          return console.log(err);
        }
      });
    });

    spinner.succeed();
    resolve();
  });
};Similar to the updatePackageDotJson function, we merge the templates we need to add from all the selected augmentation configs. For each, we utilise fse to output the contents of the template at the desired path.
commitGit
create-react-app intialises a GIT repository. Since we added and modified a number of files we will have a number of untracked changes. We want our user to have a fresh experience, free of these untracked files. So we simply add all the files and commit them!
const commitGit = () => {
  const spinner = ora("Committing files to Git...");

  return new Promise(resolve => {
    shell.exec(
      'git add . && git commit --no-verify -m "Secondary commit from Create Frontend App"',
      () => {
        spinner.succeed();
        resolve();
      }
    );
  });
};That's it! View the file in it's entirety at: https://github.com/HarveyD/create-frontend-app/blob/master/react/reactApp.js
Running
Let's test out our new CLI tool. Run node index.js or npm run start (if main in package.json points to index.js) and you should see:

Followed by our three options:

It'll then run all the steps:

If everything went okay, you should see test-app within your CLI tool:
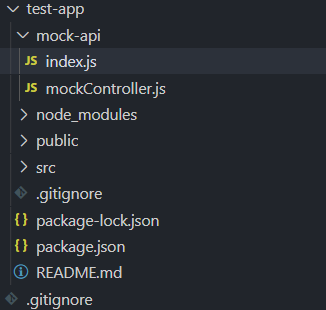
It should have all the dependencies, templates and package.json entries we specified!
Publishing and Consuming
Before publishing, make sure to add the following to your package.json:
  ...
  "bin": {
    "": "./index.js"
  },
...This allows the user to execute the script globally once the CLI tool is installed globally via NPM!
Now all there's left to do is publish your new CLI tool to NPM! To find out how to do this, follow: https://blog.harveydelaney.com/setting-up-a-private-npm-registry-publishing-ci-cd-pipeline/
After publishing your library to an NPM registry, you should be able to install it by running: npm i -g create-frontend-app.
Then by running create-frontend-app, you should be presented with the CLI's questions! After answering the questions and letting the tool run, your new project should be created in the directory you rancreate-frontend-app.