Configuring your Usenet Provider and Indexer with Sonarr/Radarr on Unraid
Last year I installed Unraid on my NAS in addition to Sonarr/Radarr/Deluge. This setup helped me automatically download and manage my media content. Read more about how I set it up here.
Recently, I was surfing the web and discovered Usenets. To me, Usenets were a new, different method to download media content! I decided to weigh up the pros and cons of torrents and Usenets by giving Usenets a go!
NOTE: this article assumes you've already set up Unraid/Sonarr/Radarr, follow the above article if you haven't.
Torrent Setup
You probably know what torrents are and how they work. If not, read more here.
A typical torrent setup using Sonarr/Radarr might work as follows:
- Use Sonarr/Radarr to select a media file to download
- Sonarr/Radarr communicates with torrent indexers
- Sonarr/Radarr adds the torrent file to Deluge and kicks off the download
- Deluge downloads the content and once complete, will copy the file over to a completed directory
- Sonarr/Radarr detects the file has been complete, renames and copies the file to the appropriate media directory used by Plex
My take on the pros and cons of using torrents are:
| + | Torrenting is free. It doesn't require any paid subscriptions to any services for you to download your content! |
| + | Setup and configuration to use Torrents is simple and can be automated! |
| + | Torrents are well known method of downloading content. More people know about torrents and have a basic understanding of how they work already. |
| - | Torrents rely on seeders. Low amount of seeders will result in slow download speeds. |
| - | Seeding is usually required while/before downloading |
| - | Torrents can have malicious or low quality files. Although, this largely depends on the indexers you use and I've personally found this to be very rare if you ignore all .exe files |
Usenet Setup
Usenet has a lot of history behind it. In summary, it were originally designed as a bulletin-board service. Usenet eventually became a popular place to store and sort any kind of file. An organisation called Newzbin created the NZB file which pointed to where files existed on the Usenet. A whole ecosystem around Usenet and the NZB file then grew until it became what it is today. Usenets are different to torrents in that files are downloaded from a single server, as opposed to from other multiple other "peers" like you do in Torrents.
Read more about the history of Usenets and how they work here.
An automated Usenet download flow would work as follows:
- Use Sonarr/Radarr to select a file or wait for a file to be released
- Sonarr/Radarr communicates with a Usenet Indexer to find a matching file
- Using the index, Sonarr/Radarr sends the file location to a Usenet Downloader
- The Usenet Downloader communicates with a Usenet Provider which serves the content to the downloader
- Once the download is complete, it will copy the file to a completed directory
- Sonarr/Radarr detects the file has been complete, renames and copies the file to the appropriate media directory
My take on the pros and cons of Usenets are:
| + | Usenets providers provide unlimited download speeds. You are only limited by your network |
| + | Most Usenets providers have SSL ports so no one can snoop on what you are downloading and your IP address is kept private |
| + | Usenet providers, indexers and downloaders all have a large amount of support, documentation and automation functionality available as well as having large, active communities supporting them |
| + | Don't have to seed (upload) before/while downloading |
| - | To use Usenets, you need a subscription to a Usenet provider and indxer service. These subscription costs money |
| - | Usenets are a less popular, unfamiliar, unknown alternative to torrenting. There may be some apprehension in using Usenets for these reasons (new things can be scary) |
In both approaches, there are positives and negatives. As previously mentioned, I decided to give Usenets a go to see if I would like them better than torrents.
Before we get started, we'll need to pick a provider and an indexer to use. There are many indexers and providers out there, I'll just be suggesting a few of them. I would encourage you to do your own research as well.
Recommended Usenet Providers
Newshosting (Harvey's Recommendation)

Newshosting is my personal choice and what I'll be using for the article. Newshosting is one of the most popular Usenet providers out there (and for good reasons). They have been in the game since 1999, have super long retention period (4299 days), an easy to use web interface, unlimited downloads and uncapped speeds. Another plus was that it integrated seamlessly with Sonarr and Radarr.
On certain Newshosting plans, a zero-log VPN service called PrivadoVPN comes for free. I've been using PrivadoVPN and have found the speeds, available regions and VPN desktop app to be top notch.
If you're only looking to give Usenets a go, I highly recommend using Newshosting's free 30GB 14 day trial.
Two other providers I've used before and would recommend are:
- Easynews -
$14.95$7.50/month (7 free day trial included) - UsenetServer -
$9.99$7.95/month (14 day free trial included)
Read this article to learn more about choosing the best Usenet provider for you.
Recommended Usenet Indexers
NZBGeek (Harvey's Pick)

My personal choice, I chose NZBGeek because it was on sale for Black Friday as well as having good reviews and a good reputation for quality indexes.
Other indexers I would recommend are:
- NinjaCentral
- Miatrix
- GingaDaddy
- DrunkenSlug (if you can get a referral)
Usenet Downloaders
Sonarr/Radarr are configured to use a number of download clients. Sonarr/Radarr support four different Usenet clients:
I was tossing up between Sabnzbd and NZBGet (due to both having a high amount of features/support/community). I ended up going with NZBget as I preferred the UI of it slightly more and will be using it for this article.
UnRAID Setup
In UnRAID, navigate to Plugins and open the Community Applications plugin (assumed to have been installed already). Search for nzbget and click Install:
Use the default port (6789) and setHost Path 2 to /mnt/user/Downloads/NZB and hit Done:

Once the Docker image has been downloaded and container set up, open NZBGet in your browser. You'll be prompted for a username and password which are:
- Username:
nzbget - Password:
tegbzn6789
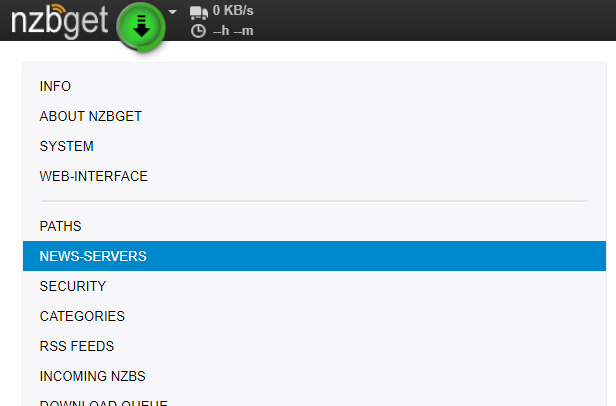
Then in the top menu select Settings. Then select News-Servers on the left:
Your Usenet provider should provide four essential pieces of information:
- Server address
- Port (usually
119for unencrypted and563for encrypted) - Username
- Password
All three of these details were available in Newshosting immediately after I joined the monthly subscription plan. Enter them in under the correct fields:

Set Encryption to Yes and change the port from 119 -> 563 if you want to encrypt your Usenet download traffic (highly recommended).
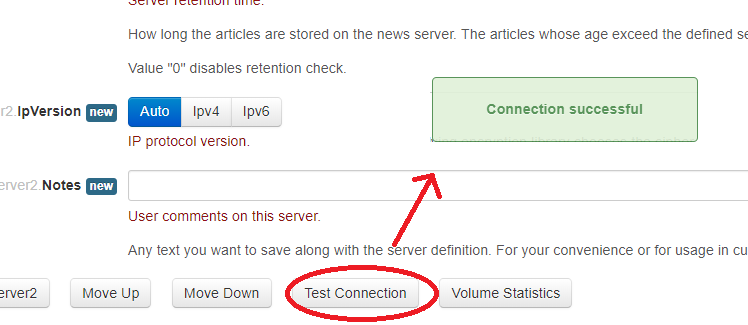
Test the connection and then click save all changes in the bottom left and you'll be prompted to restart NZBGet. Restart and NZBGet will be all ready to use!
Since we're configuring both Sonarr and Radarr to work with NZBGet, we need to add two categories on NZBGet. Do this by going to Settings -> Categories -> Add Another Category. Enter Radarr in the Name field then click Save:
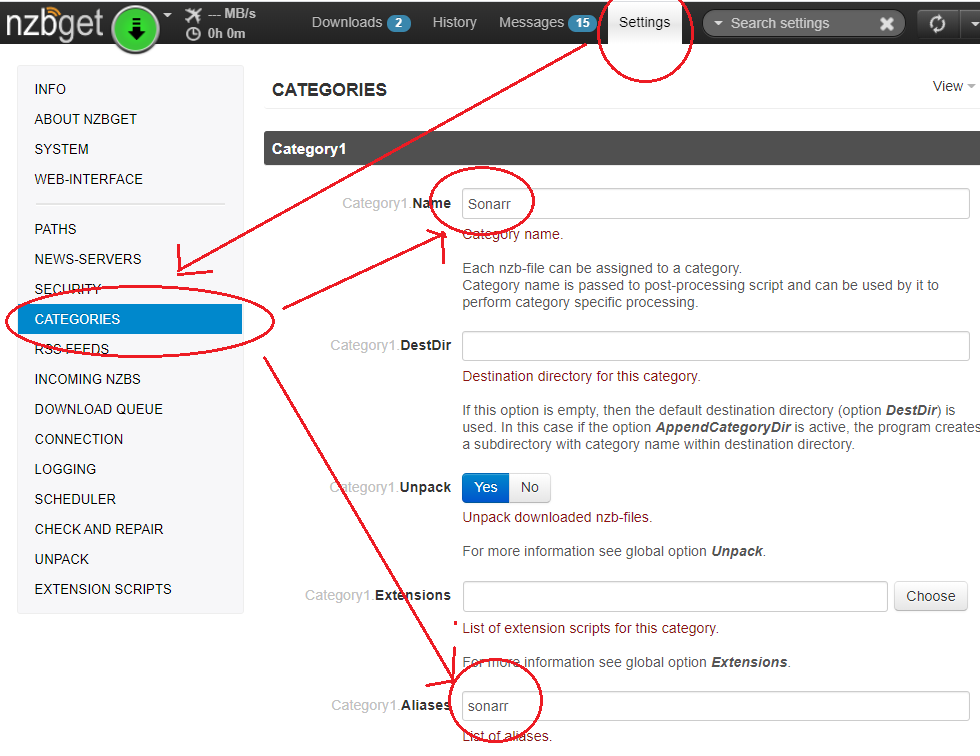
Repeat this for Sonarr as Category2.
Radarr (and Sonarr) Setup
With our Usenet download client and indexer (doesn't require setup) all ready, now we just have to configure Sonarr/Radarr to use them.
I'll just be going through how to set Radarr up - Sonarr will be identical, you'll just have to repeat the steps.
Add Indexer
Step one is to add the indexer. Navigate to Settings -> Indexers -> Add Indexer (+):
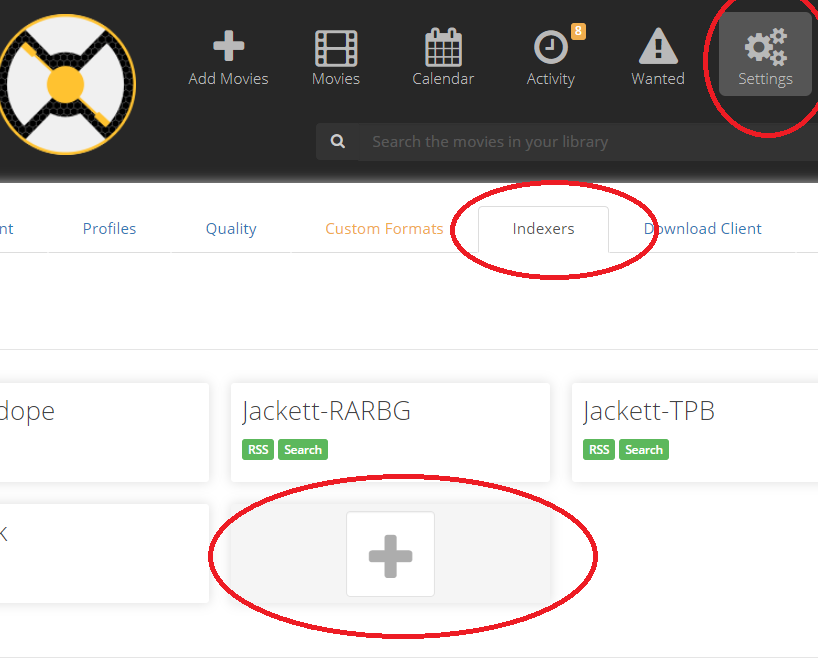
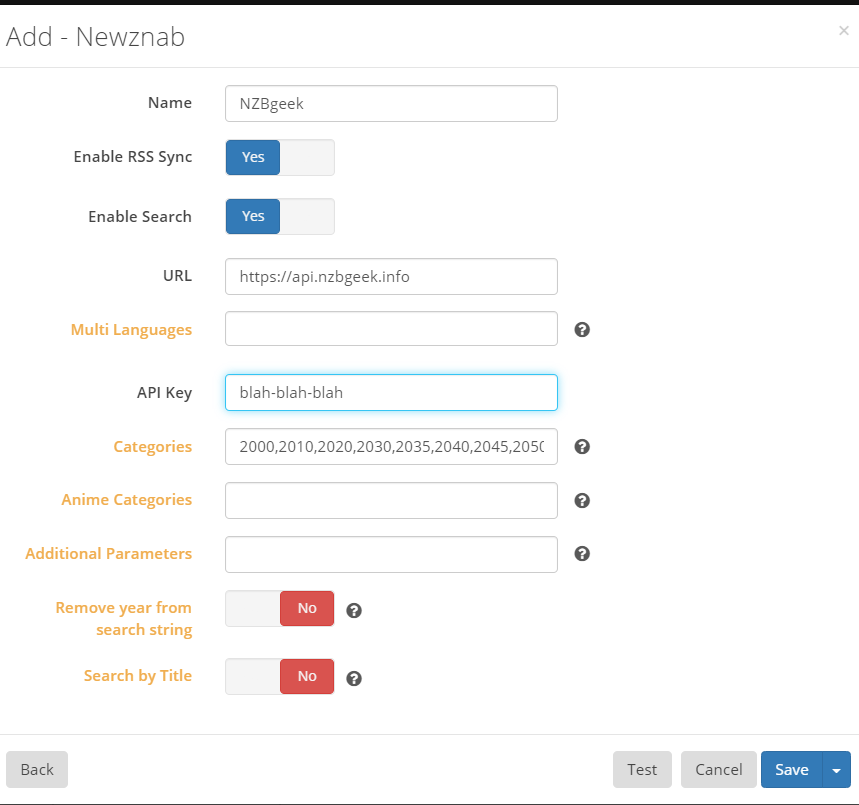
Under Usenet -> Newznab -> Presets, find your indexer of choice (I use NZBGeek). Then simply add the API Key you got from your indexer, click Test and if everything is okay, click Save:
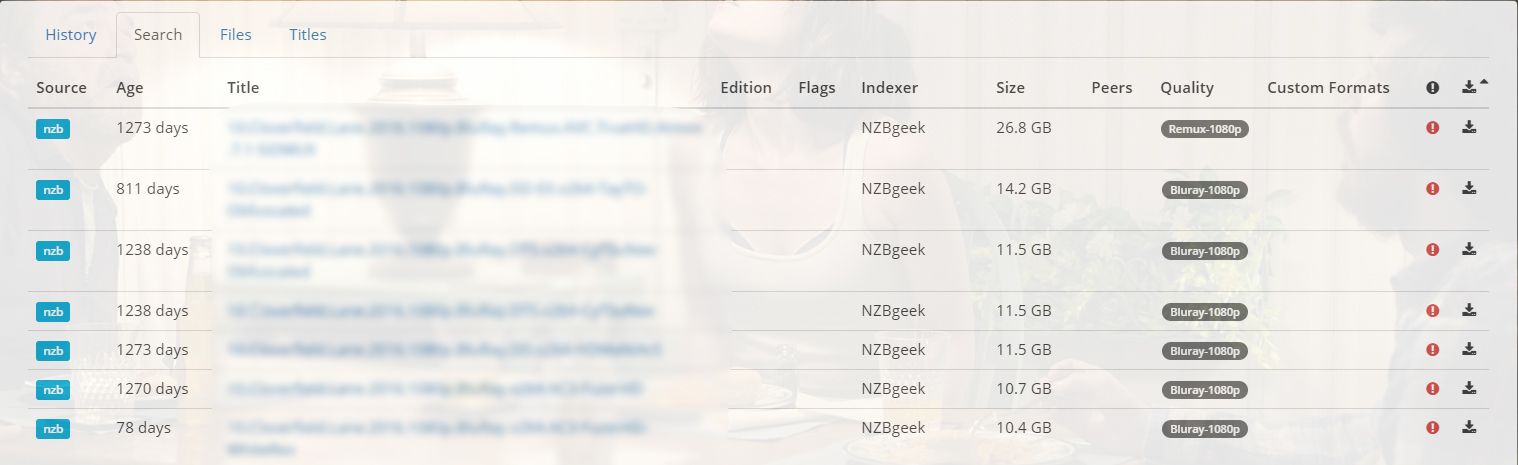
Now if you navigate to any content you have and perform a manual search - you will see a number of results from NZBGeek:
Add Download Client
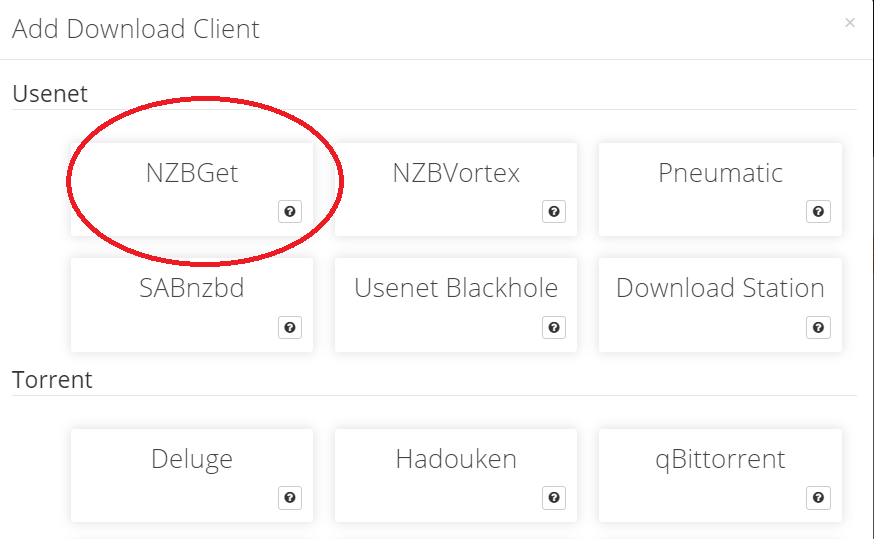
Navigate to Settings -> Download Client -> Add new client (+):
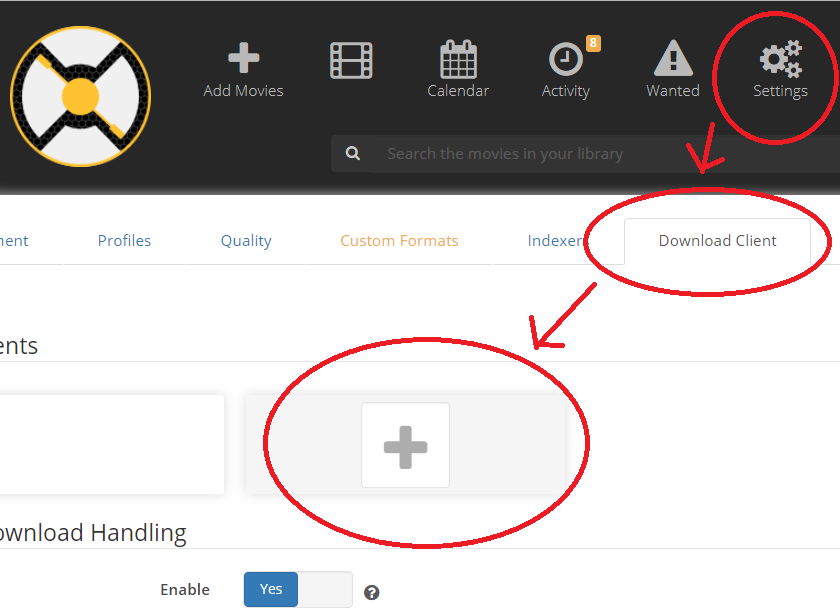
Then select NZBGet (first option):
Then in the popup, add:
- Host: IP of your Unraid Server
- Port: 6789
- Username:
nzbget - Password:
tegbzn6789
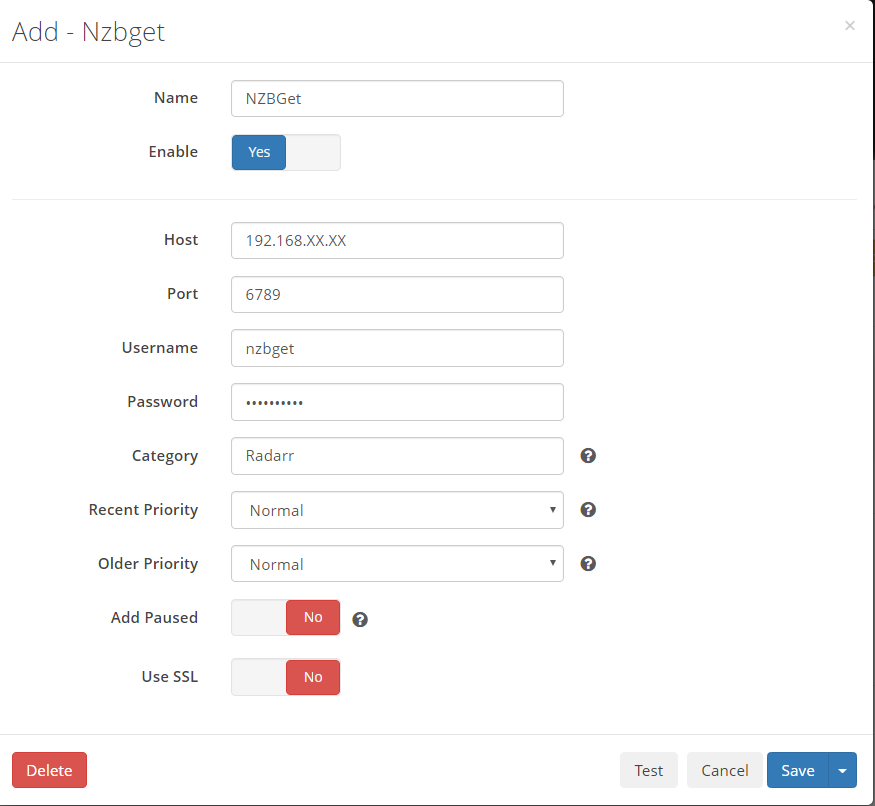
Note: you'll notice that Category has Radarr. If you are setting up Sonarr, you need to make it Sonarr which will map to the correct category that we added to NZBGet previously.
Test it and if successful, click Save.
That's it! You've setup your Usenet indexer and Usenet download client.
NOTE: Remember to repeat the above steps for Sonarr!
Testing it out
In Radarr, search for some new content and click Add and Search. After a few seconds, you should see your new media file start downloading in NZBGet:
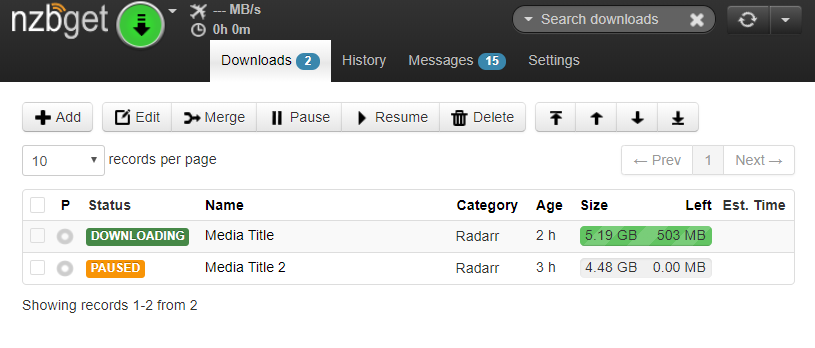
After the download has complete, NZBGet will move the file to the /downloads/completed/radarr directory. Radarr will then copy the file over to your Media directory automatically. You can then open up your Plex server, refresh your library and watch your new media content!