Installing Radarr, Sonarr and Deluge on your Unraid Server
In my first Unraid article, I went through my experience installing and configuring Unraid. Overall the setup was very easy and took me one afternoon to complete.
I wanted my Unraid/NAS setup to house all my media content. I didn't want management of this content to be manual, so I looked for automated media-management software solutions compatible with Unraid. These applications needed to automate the discovery, downloading and moving/renaming my media content. The first application I stumbled across which did this is Couch Potato.
After reading good things about Couch Potato, I decided to give it a go. After downloading the Docker image, I attempted to set it up. The initial configuration was fine, but I was simply not able to get it connecting to Deluge (my favourite torrent client). After spending hours trying fix the issue and trying to find other people who ran into the same issue, I gave up and looked for an alternative.
My search for an alternative lead me to Sonarr. Sonarr met my requirements perfectly! Sonarr is easy to configure, worked perfectly with Deluge (my choice of BitTorrent client) and had an amazing user interface.
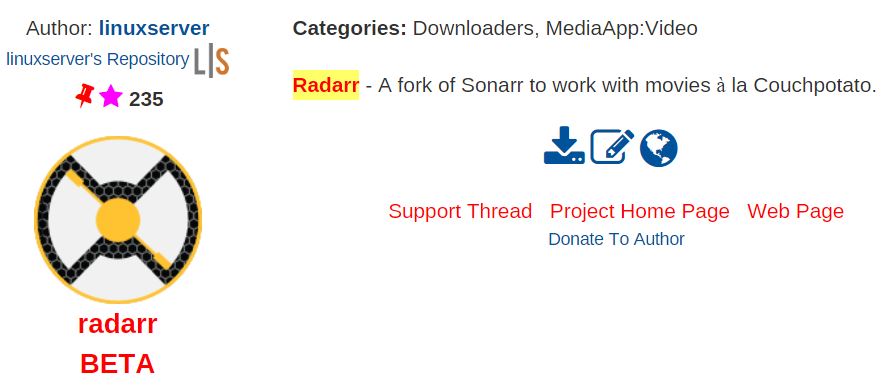
I also discovered Radarr - a fork of Sonarr with near identical setup which helps download media content that Sonarr doesn't support.
To help Sonarr and Radarr search through indexers for torrents, I installed Jackett. Jackett allows you to aggregate a number of torrent indexers into a single source and integrates well with Sonarr/Radarr.
Update 03/06/2020: I've since switch from torrents to Usenets for my downloading needs, read more about this:
Installation and Configuration
I'm going to step through installing and configuring the following applications which will allow you to automate the discovery, downloading, moving and organisation of your media content! This requires:
- Deluge
- Jackett
- Sonarr
- Radarr
Prerequisite
Before starting, make sure you have the Community Applications Plugin installed on Unraid before proceeding. To do this, navigate to the Plugins tab in Unraid, then click Install Plugin and paste the following URL in:
https://raw.githubusercontent.com/Squidly271/community.applications/master/plugins/community.applications.plgThe plugin should then appear in the list:

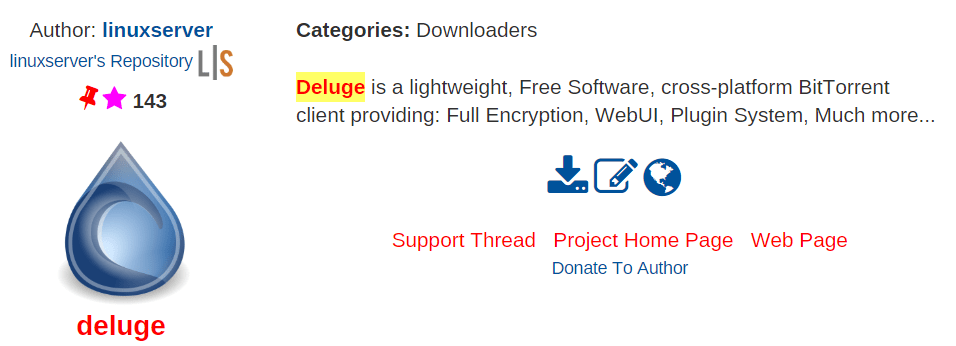
Deluge
Deluge is a popular open source BitTorrent client. It works well with Sonarr and Radarr. I've had good experiences using Deluge before and felt right to keep using it. We will be using Deluge to download all our media, feel free to use alternatives like qBittorrent or uTorrent.
First, let's create an Unraid share that will act as the destination for all your downloads:
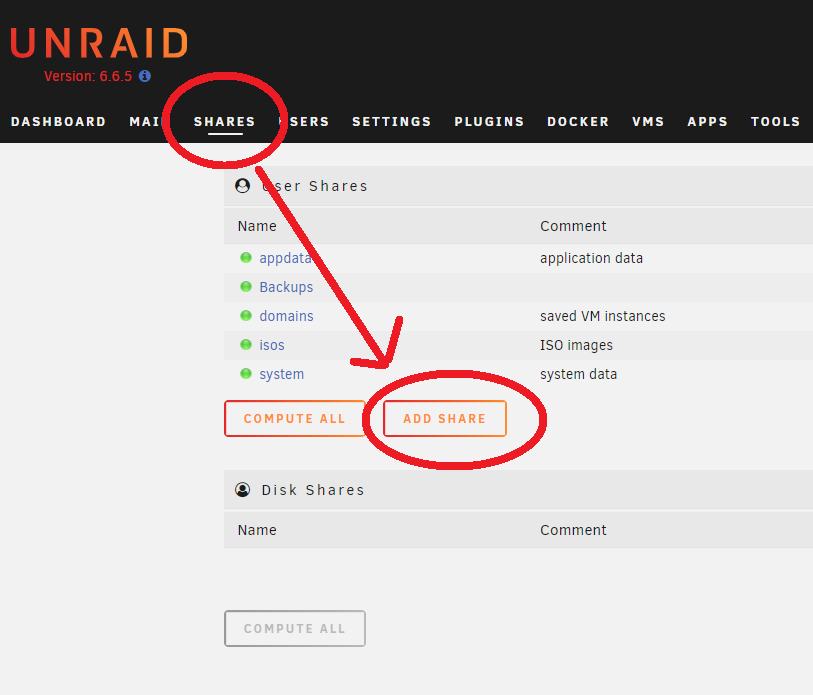
I recommend calling it Downloads. Make sure that this share is public and not private. This is because of permission requirements from Sonarr and Radarr.
Next, navigate to the Community Applications plugin and search for Deluge by linuxserver and click install.
For the settings, the only field you need to change is the Downloads volume mapping. Input the newly created Downloads share you created.

Now go into the newly created Deluge container. You'll be prompted for a username and password. Enter:
- Username:
admin - Password:
deluge
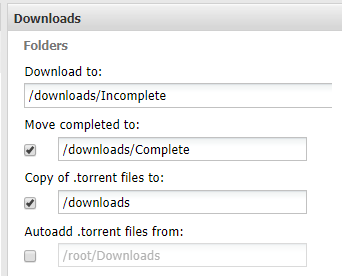
Connect to the default daemon and then click the Preferences button at the top. We will tell Deluge to put all downloads in progress in the Incomplete folder and all the finished downloads in the Complete folder.
That's it! Deluge should be correctly configured. To test it out, go to your favourite torrent indexer site and copy the magnet URL into a new torrent by clicking the + button in the top left. It should add the torrent and start downloading.
Jackett
Before we setup Sonarr and Radarr, we'll need to configure a service that will allow Sonarr/Radarr to grab torrent files from indexers. Jackett makes it very easy to allow Sonarr/Radarr find quality torrents from a number of popular torrent indexer sites (as of writing this article 259 are available).
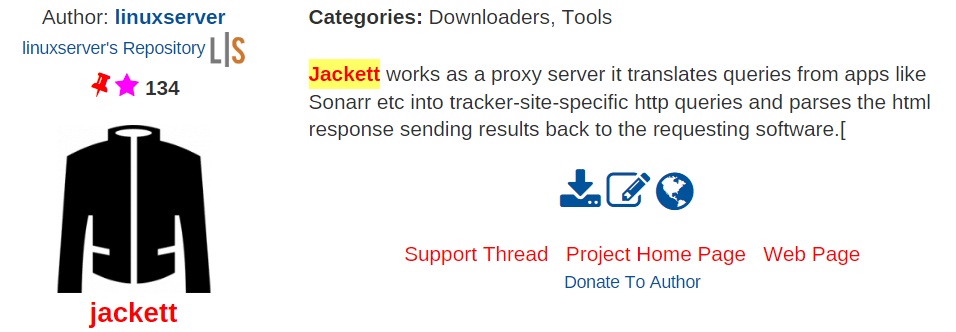
Jackett works as a proxy server: it translates queries from apps (Sonarr, Radarr, SickRage, CouchPotato, Mylar, etc) into tracker-site-specific HTTP queries, parses the html response, then sends results back to the requesting software. This allows for getting recent uploads (like RSS) and performing searches. Jackett is a single repository of maintained indexer scraping & translation logic - removing the burden from other apps.
Search for Jackett using the Community Applications plugin. Again, we'll use linuxserver's image.
Set the /downloads volume mapping to the Downloads share we created. Once the image has been installed, open it up in your browser.
Click the Add Indexer button at the top of the page. You'll be presented with a popup with a bunch of torrents:

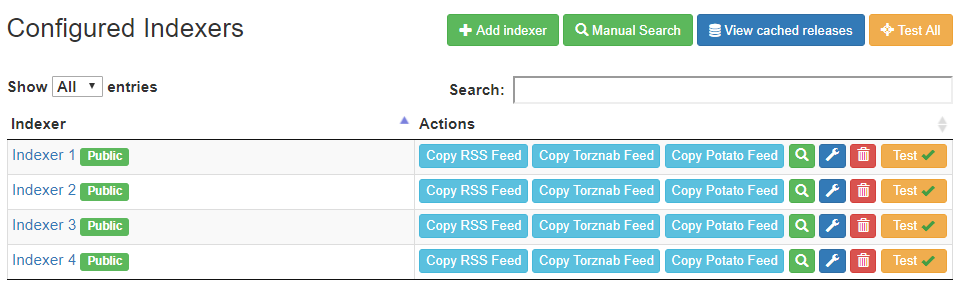
Click the + button for each indexer you like. I went with 4 torrent indexers. These are ones I'm familiar with and comfortable using. I suggest doing your own research to find indexers that you find will provide high quality torrents. You'll need to add them one by one. Make sure they all work by clicking the Test button on the right.
That's all the configuration we'll need from Jackett for now. We won't set up a proxy, although I might cover that in another article.
Sonarr
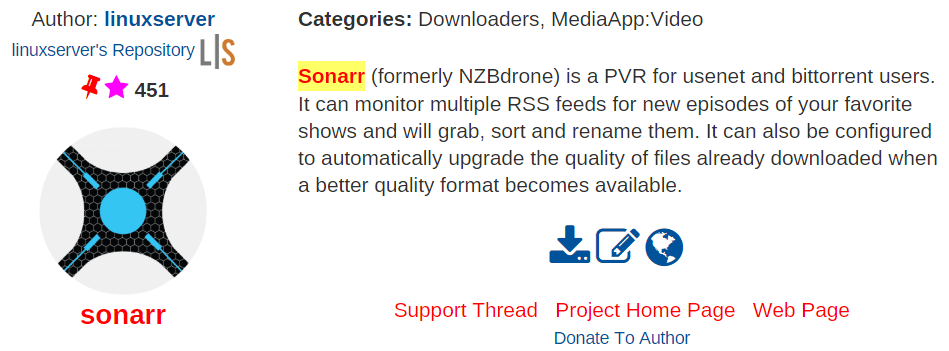
Sonarr is open-source software which automates the downloading and organisation of your media content. It keeps track of everything it has and hasn't downloaded. You can specify what content you're interested in and Sonarr will download content as soon as it's available in your desired quality. Sonarr's Docker image works perfectly on Unraid.
First, we need to create another Unraid share. Let's call it Media. Under this new share, create a folder for your Sonarr media. For this article, I'll be calling it SonarrContent.
Using Community Applications search for Sonarr and download the linuxserver image.
You'll need to specify two volume mappings, one for downloads and one for the location of your Sonarr media:
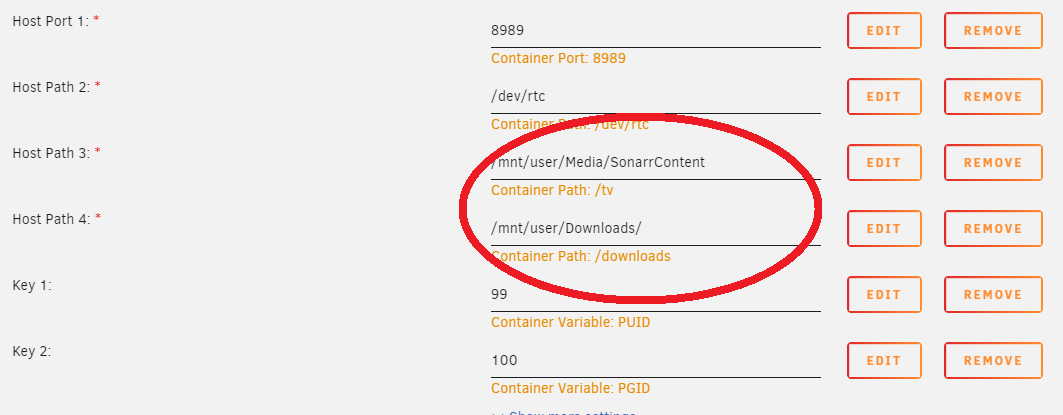
Host Path 3: should point to the folder where you want Sonarr to copy the completed content to. This should be the SonarrContent folder we created in our Media Unraid share.
Host Path 4: should point to the folder where Deluge outputs the downloaded content. This should be the Unraid share we created in the Deluge setup called Downloads.
Once the Docker image has been installed, open up Sonarr in your browser. Navigate Settings (the gear icon at the top of the screen) and then click the Download Client tab.
Download Client
Click the + button and fill the popup with the following:
- Host: The IP address of your server, for example:
198.168.20.40 - Port:
8112 - Password:
deluge(unless you've changed it on Deluge) - Category:
sonarr(or however you want to identify downloads triggered by sonarr)
Click the Test button and you should get a message saying Testing 'Deluge' Successful in the bottom right of your screen.
Indexers
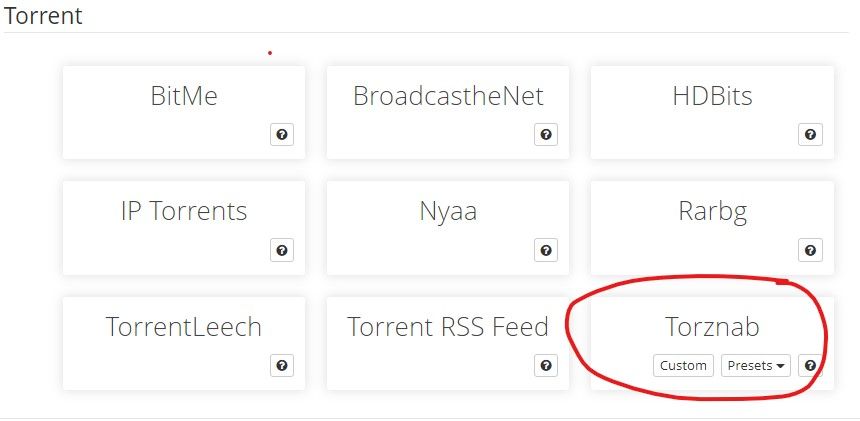
Now we need to setup indexers for Sonarr. We will be using our Jackett proxy server that we just set up. Open up Jackett in another tab. In Sonarr, navigate to the Indexers tab under Settings. Click the + button and choose the Torznab option (we'll need to repeat the following for each indexer we selected):
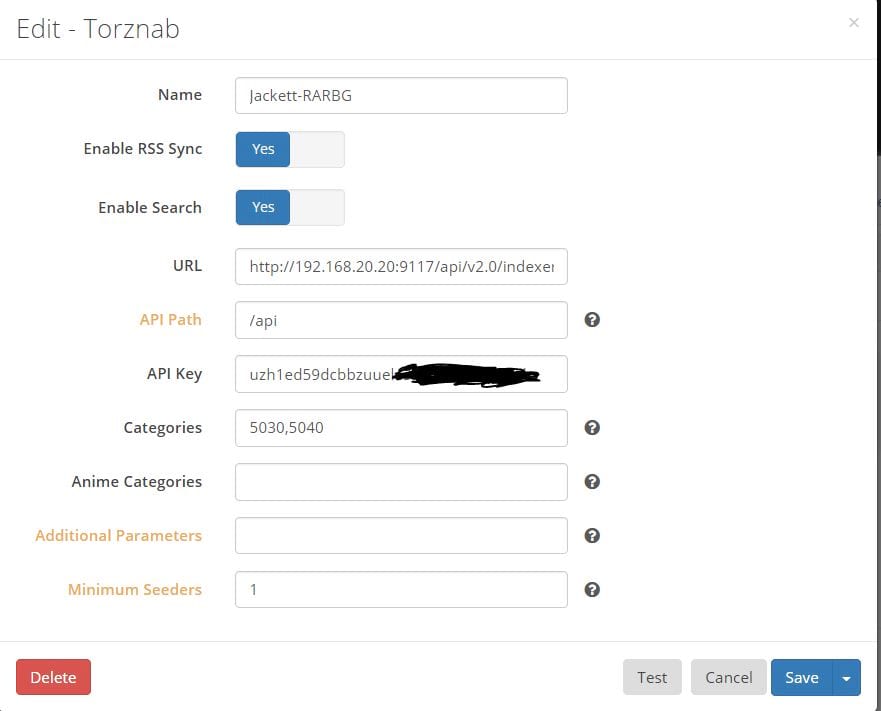
Fill out the popup with the following:
- URL: In Jackett - click the button for
Copy Torznab Feed. Paste the result in this field.

- API Key: In Jackett - look for the API Key which is located in the top right of the application. Copy and paste it in this field.

Click the Test button and it should succeed:
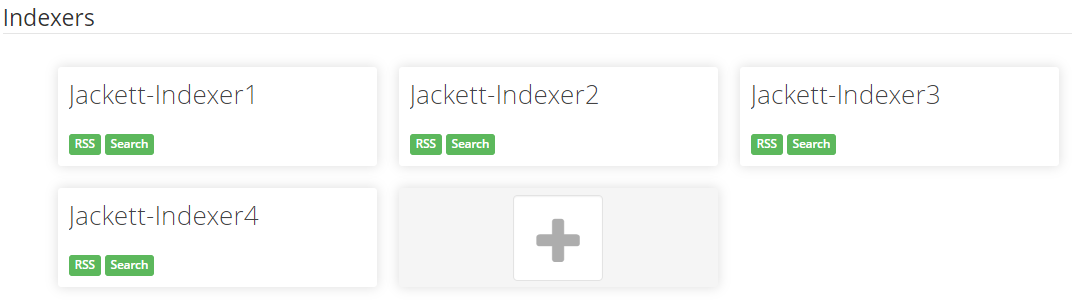
Repeat for every indexer you added in Jackett and you should end up with something like this:
Permissions
Other tutorials I have read skipped this part. I find this quite important to my setup as I wish to have ability to manually all the media downloaded by Sonarr. If we don't change the default settings, we won't be able to modify any of these media files (renaming, deleting or moving). If you're okay with that, then skip this step.
Navigate to Media Management under Settings and then scroll to the bottom to the Permissions section. Update this section to the following.
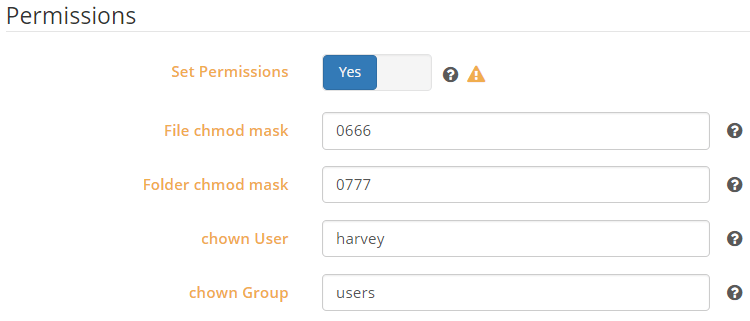
Read more about Unix permissions here.
Of course, instead of harvey you would use the user that you use to access your media. Now, we have all permissions to modify all the media downloaded by Sonarr.
Feel free to configure any other settings to personalise Sonarr. For example, you might want to change how your files are named (Media Management) or the quality of your downloads (Quality).
Using Sonarr
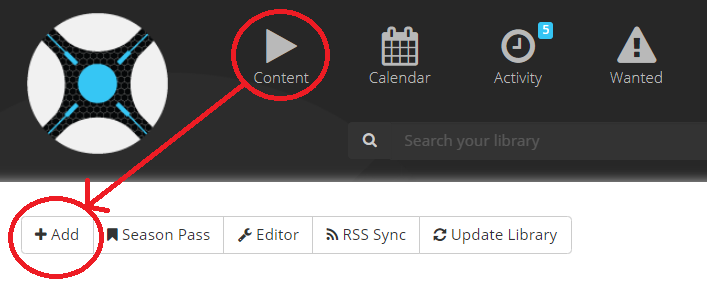
To test Sonarr was configured correctly, add a new title by navigating to your content library and clicking Add:
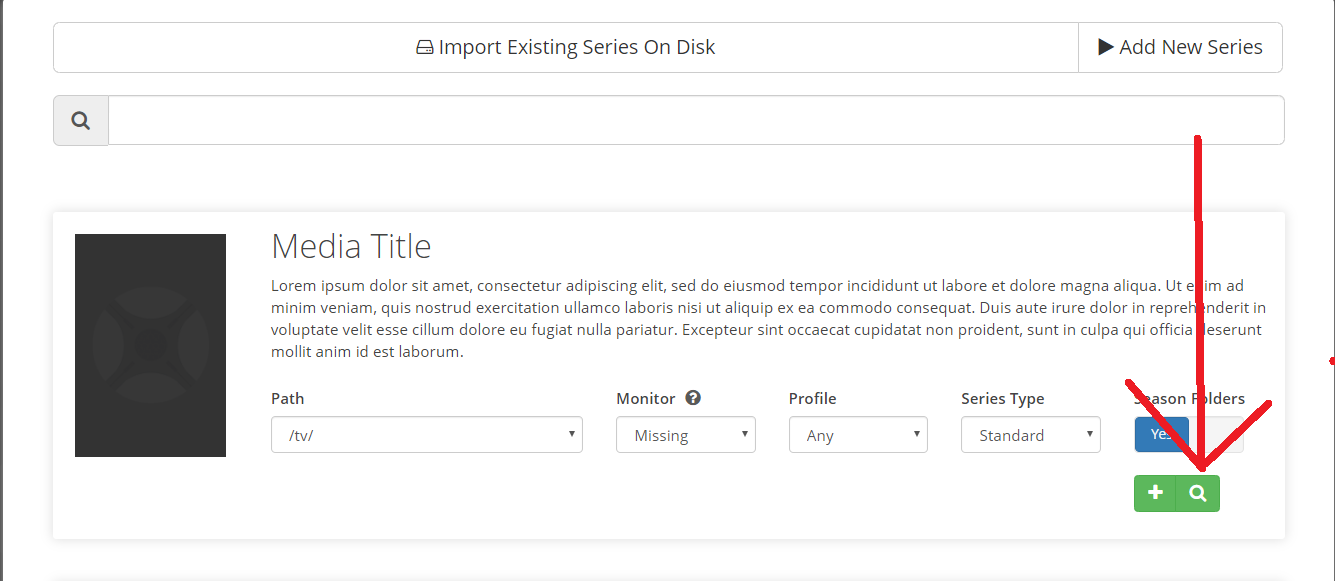
Search for any media titles and click the green magnifying glass button. Sonarr will then search the indexers for a torrent of the content that matches your preferred quality and send it to Deluge to be downloaded:

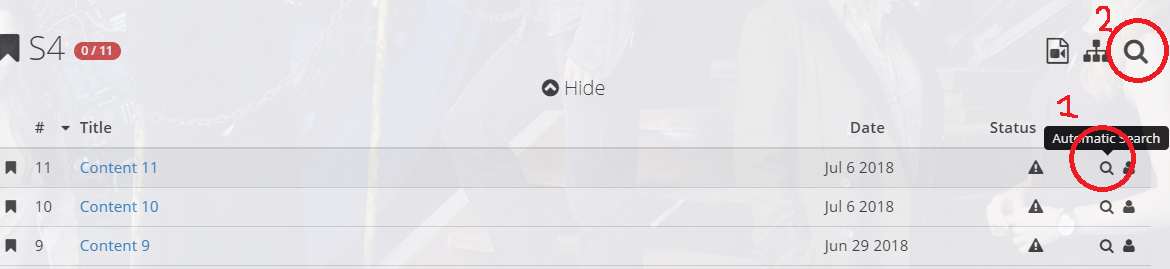
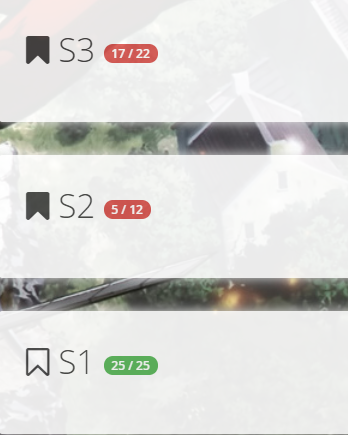
Once the media has finished downloading, Sonarr will automatically detect this. It'll then rename and move the file to the SonarrContent share. You can then see an overview of what content has been downloaded and what's missing:
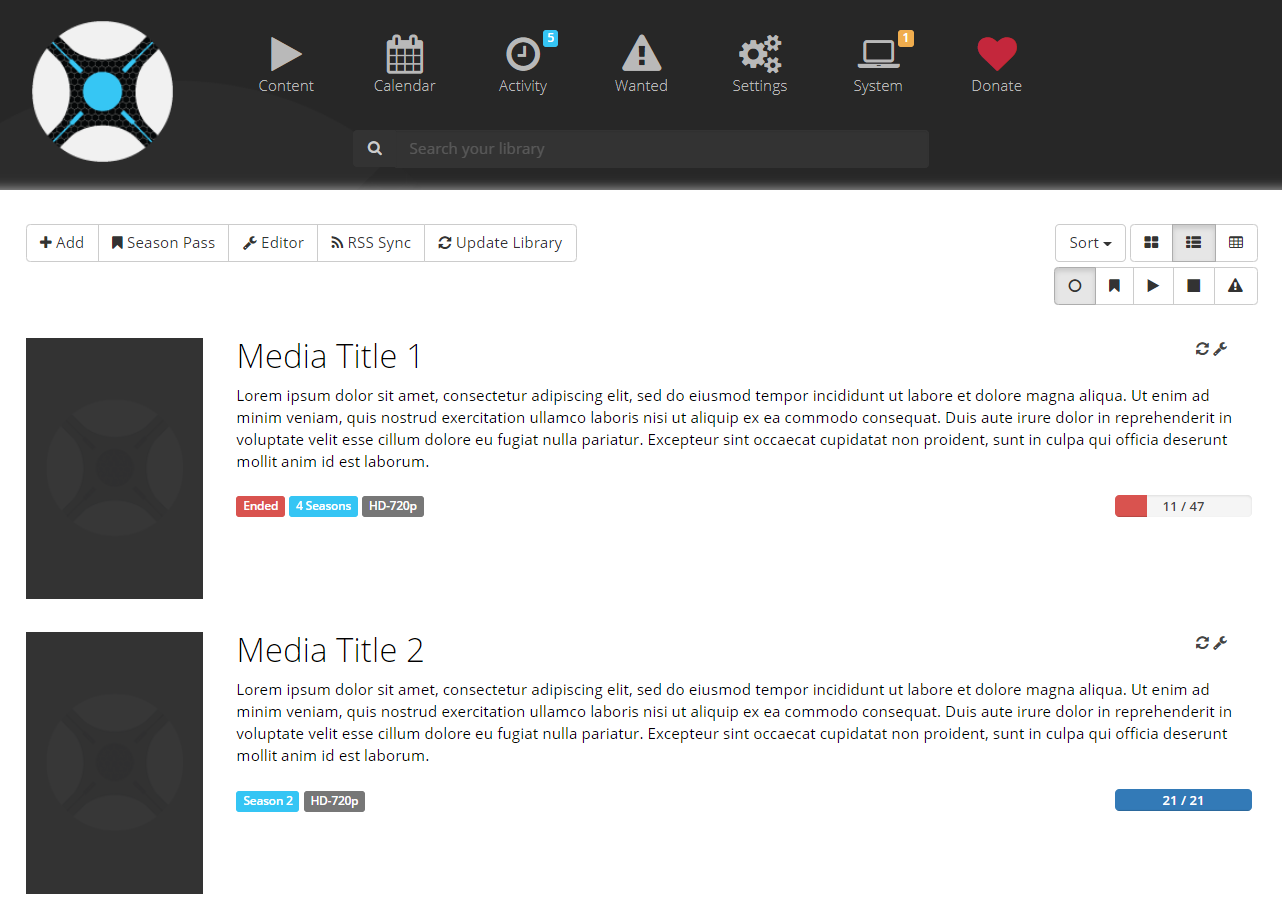
Sonarr will be able to detect which particular files you have and which you are missing. It also makes it easy to download these missing files by only requiring you to go into the title and searching for individual titles (1), or all searching for all at once (2):
Radarr
Radarr is another open source software solution that I recommend installing. Radarr is a fork of Sonarr for media content that Radarr doesn't support. Similarly to Sonarr automates the downloading and organisation of this content. Radarr will download requested content as soon as it's available in your desired quality.
Setting up Radarr is identical to Sonarr. Use the Community Applications, search for Radarr and download the linuxserver image.
The setup for Radarr is identical to Sonarr, so repeat everything we did in the Sonarr section. To re-iterate, you'll need to:
- Create a new folder in the
Mediashare - RadarrContent - Configure a download client - Deluge
- Configure Indexers - Jackett
- Setup permissions.
Using Radarr is very similar to Sonarr. You are able to search and choose content for which you want Radarr to handle the downloading, moving and renaming for.
Migrating Existing Content to Radarr/Sonarr
If you're like me and have a bunch of content that you downloaded from before switching over to Radarr/Sonarr, you'll probably want to move that content to be tracked and managed by Radarr/Sonarr. Fortunately for us, it's easy to do so!
Sonarr
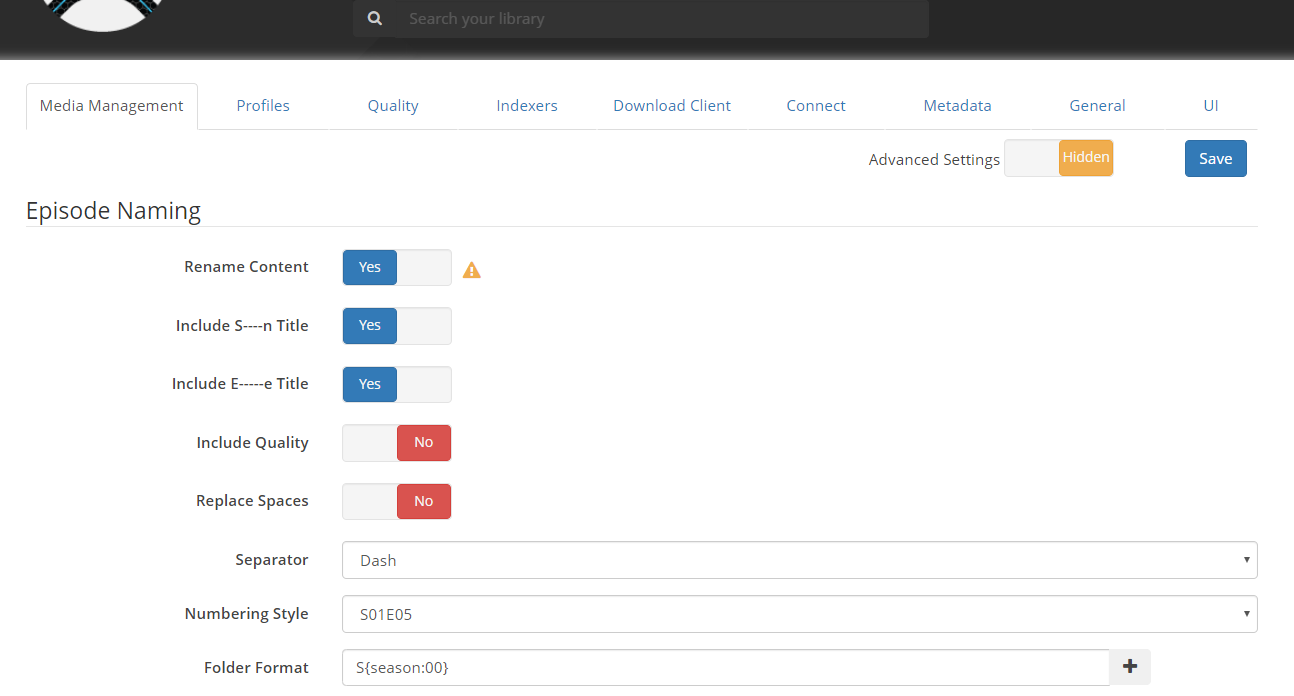
First, review the settings under Settings -> Media Management:
Next, make sure that you've added the media title to be tracked by Sonarr.
Now, let's say you have your existing content structured like:
/MediaContent
  /MediaTitle
    /01
      /MediaTitle-BlahBlah-01XXXX.mp4
      /MediaTitle-BlahBlah-02XXXX.mp4
    /02
      /MediaTitle-BlahBlah-01XXXX.mp4
      /MediaTitle-BlahBlah-02XXXX.mp4
You would need to copy the /MediaTitle folder over to your SonarrContent folder. You would also need to make sure the folders and filenames are similar to the settings outlined in MediaManagement. If we use the settings in the screenshots, it should be:
/MediaContent
  /MediaTitle
    /S01
      /MediaTitle-S01E01.mp4
      /MediaTitle-S01E02.mp4
    /S22
      /MediaTitle-S01E01.mp4
      /MediaTitle-S01E02.mp4
Once the folders and files are copied over, in Sonarr, navigate to your media title and click the Recycle icon:

Sonarr will then proceed to scan your hard drive and perform fuzzy matching on the filenames of media folders/files in SonarrContent. For all matching files (that don't already exist), Sonarr will add it into it's management system. You should then see it start to populate the catalogue:
If it fails to recognise some files, double check the folder structure and filenames of your existing files.
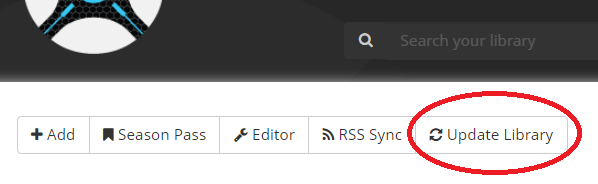
Note: Instead of doing this one by one, you can also click the Update Library button to have Sonarr update all the titles it's tracking:
Radarr
The process for Radarr is mostly the same, expect the folder structure is different. Radarr expects each media file to have the following structure: Content Title (Year)/Content Title(Year).mp4.
So if you had:
/MediaContent
  RandomMediaTitle (2012).mp4
  OtherMediaTitle (2010).mp4
You would need to change it to:
/MediaContent
  /RandomMediaTitle (2012)
    RandomMediaTitle (2012).mp4
  /OtherMediaTitle (2010)
    OtherMediaTitle (2010).mp4
Once that's done, copy the files over to your RadarrContent folder and follow the same steps outlined in Sonarr to have it track your existing content!
Conclusion
We've quickly and easily setup our media automation server on Unraid! You should be able add your favourite media content to your wish list and Radarr/Sonarr will automatically download them in your desired quality, move and rename them for you.