
Integrating React Components into an Angular 2+ Project
In my final few weeks at RateSetter, I was working on one last, organism level component to add to our RateSetter Component Library.
We had created multiple "vehicle lookup" UIs that were implemented differently across four different projects (two React and two Angular 2+). When we wanted to add features to this vehicle lookup UI, we found it difficult and time consuming to go through each project, understand how the vehicle lookup was implemented and then update it.
We decided to create one component that would be consumed by each of the UI projects. This allowed us to write code once in the component library, publish it and then simply update the component library dependency in each project. It resulted in more rapid, bug-free development.
I whipped up the vehicle lookup component using React (with TypeScript), Hooks and Context and added it to our component library. Integrating the component within React projects was trivial, but integrating it within Angular 2+ projects was an unknown for me.
After a bit of research and experimenting, I found that integrating a React Component within an Angular 2+ project is surprisingly simple! Follow along to find out how I did it.
Note: This article uses react + react-dom @ 16.13.1 and Angular @ 9.1.0. I used @angular/cli to spin up a basic Angular project called react-integration-app.
Integration!
React Component
Let's say you wanted to integrate the following React component into an Angular 2+ project:
import React, { useCallback, useState } from 'react';

export interface IFeelingFormProps {
  name: string;
  onSubmit: (feelingUpdate: string) => void;
}

const FeelingForm: React.FC<IFeelingFormProps> = ({ name, onSubmit }) => {
  const [currentFeeling, setCurrentFeeling] = useState('');

  const onFeelingChange = useCallback(
    (event: React.ChangeEvent<HTMLInputElement>) => {
      setCurrentFeeling(event.currentTarget.value);
    },
    []
  );

  const onSubmitEvent = useCallback(() => {
    onSubmit(`${name} is feeling: ${currentFeeling}`);
  }, [name, currentFeeling]);

  return (
    <form onSubmit={onSubmitEvent}>
      <label htmlFor="feeling-input">How are you feeling?</label>
      <input
        id="feeling-input"
        onChange={onFeelingChange}
        value={currentFeeling}
      />
      <button type="submit">Send feeling</button>
    </form>
  );
};

export default FeelingForm;
Dependencies
To get React components rendering in your Angular project, we need to install React. In react-integration-app run:
npm i --save react react-domIt also helps to have React types installed:
npm i -D @types/react @types/react-domAlso, don't forget to install your component library!
Angular Wrapper
In your Angular project, create a new directory in /src called react-feeling-form and in it create react-feeling-form.component.ts. In it, add:
import {
  Component,
  OnChanges,
  Input,
  Output,
  EventEmitter,
  AfterViewInit
} from '@angular/core';
import * as React from 'react';
import * as ReactDOM from 'react-dom';
import { FeelingForm } from '@harvey/harvey-component-library';
import { IFeelingFormProps } from '@harvey/harvey-component-library/build/feeling-form/feeling-form';

@Component({
  selector: 'app-react-feeling-form',
  template: '<div [id]="rootId"></div>'
})
export class ReactFeelingFormComponent implements OnChanges, AfterViewInit {
  @Input() name: string;
  @Output() submitEvent = new EventEmitter<string>();

  public rootId = 'feeling-form-root';
  private hasViewLoaded = false;

  public ngOnChanges() {
    this.renderComponent();
  }

  public ngAfterViewInit() {
    this.hasViewLoaded = true;
    this.renderComponent();
  }

  private renderComponent() {
    if (!this.hasViewLoaded) {
      return;
    }

    const props: IFeelingFormProps = {
      name,
      onSubmit: (res: string) => this.submitEvent.emit(res)
    };

    ReactDOM.render(
      React.createElement(FeelingForm, props),
      document.getElementById(this.rootId)
    );
  }
}
Before trying to understand what's being done here, have a good read through React without JSX.
We've created a template with a div element that will act as our container to mount our React component on. We're binding the id attribute to the rootId field in our Angular component to make it easier to find in the DOM.
We're accepting accepting props that match what our React component requires - @Input() for name and an @Output() Event Emitter for our onSubmit callback.
ngAfterViewInit is used to inform our component that our container (view) has loaded and is ready to have the component mounted on it. It also performs the first render.
If we don't check the view has loaded before attempting to mount our React component (which will happen because ngOnChanges runs before ngAfterViewInit), we'll run into this error:

ngOnChanges is used to "re-render" our React component. Anytime one of the Angular inputs change, so should the props provided to our React component. From React's documentation:
If the React element was previously rendered into container, this will perform an update on it and only mutate the DOM as necessary to reflect the latest React element.React.createElement is used to create our React component, passing through the props our Angular component received. This is identical to <FeelingForm {...props} /> in JSX.
ReactDOM.render takes our freshly created React component and mounts it to our container element (which is retrieved from the DOM by rootId).
Important: We will also need to add the following to tsconfig.json:
...
"skipLibCheck": true,
"allowSyntheticDefaultImports": true
...
skipLibCheck will prevent TypeScript compiler issues when that occur when React is present. allowSyntheticDefaultImports is needed to prevent errors due to how React is exported.
Also, don't forget to add the new component to your app.module.ts Declaration field.
Using the wrapper
You would then use the wrapper component like any other Angular component. For example:
import { Component } from '@angular/core';
@Component({
selector: 'app-root',
template: `
<div className="app-container">
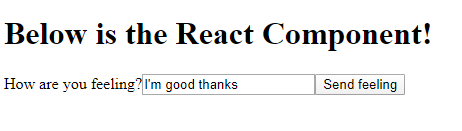
<h1>Below is the React Component!</h1>
<app-react-feeling-form
[name]="'Harvey'"
(submitEvent)="submitEvent($event)"
></app-react-feeling-form>
</div>
`
})
export class AppComponent {
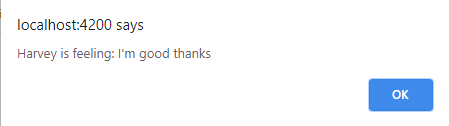
submitEvent($event: string) {
alert($event);
}
}
After running ng server you should see:
And by clicking Send feeling you'll see the alert:
Component Library Styles
If your component library exports styles as a standalone CSS file, you'll need to add it to angular.json under the styles field, for example:
...
 "styles": ["src/styles.scss", "./node_modules/@harvey/harvey-component-library/build/styles.css""]
...