Setting up BuildKite and your first Continuous Integration pipeline in 2 hours
I've written a few blogs in the past about how I setup my continuous integration pipeline for www.harveydelaney.com (https://blog.harveydelaney.com/jenkins-build-test-deploy-node-app/ and https://blog.harveydelaney.com/setting-up-jenkins-on-docker/). My Jenkins pipeline has been quite reliable and has done everything I needed.
At RateSetter we use Buildkite for our Continous Integration. I've found it to be an excellent tool that provides a simple, clean UI for all your pipelines in addition to having great documentation and an easy to use API. It also has excellent support for emojis!
When I joined RateSetter, all the BuildKite configuration had already been done. I had created new pipelines, but I wanted to learn how to set everything up from scratch. So I made it a task this weekend to migrate my CI pipeline from Jenkins to BuildKite and document it all here.
Please note, this article only covers how you can setup your pipeline from BuildKite's UI and not from writing BuildKite config files.
BuildKite Agent
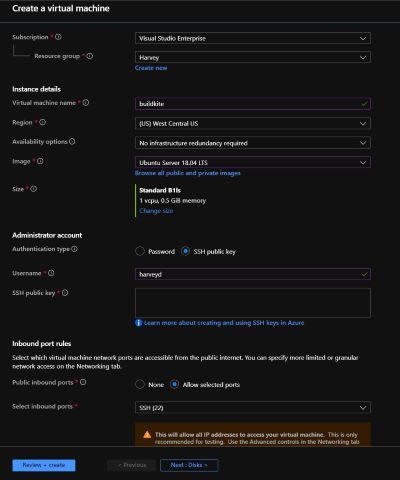
For this blog, I'll be using an Azure Ubuntu VM.
After creating an account on BuildKite, it prompted me to run some commands on a VM. So I headed over to Azure to spin up a Standard B1s machine (1 virtual CPU and 1GB RAM, 0.5GB RAM will have troubles installing the agent):
After the VM was spun up, I SSHed into the machine and ran the all steps listed under setting up an Ubuntu agent on BuildKite:
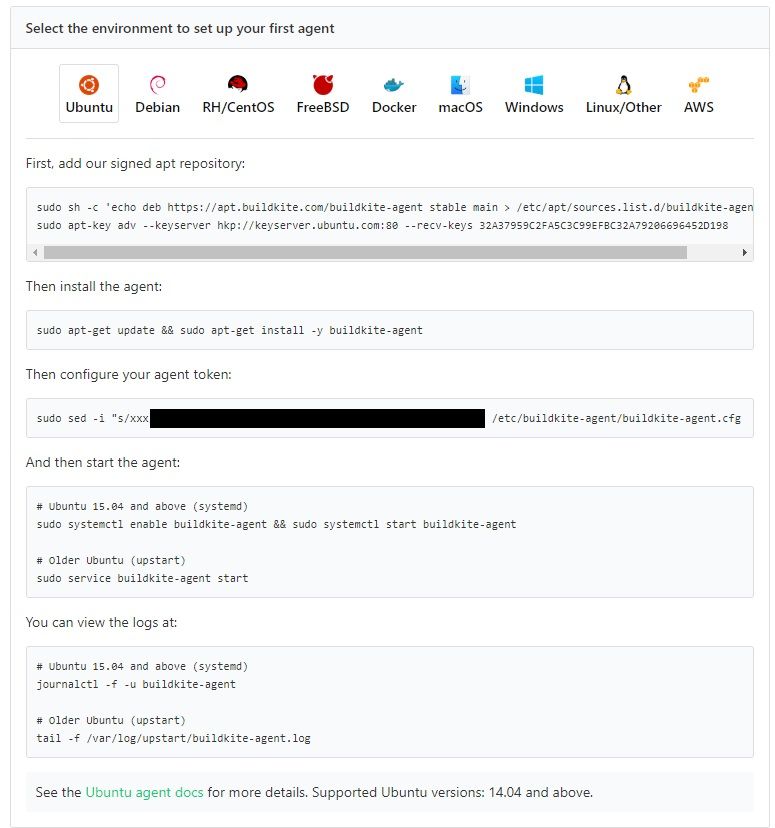
After running all these commands, got a nice little popup and then could setup my first Pipeline!

Creating my first Pipeline
I wanted to create a pipeline for Discaper. Discaper uses NextJS for the front-end ( basically a React application that has server side rendering) and Node for the back-end. I want to have two pipelines, one for the front-end and one for the back-end. The pipelines will perform as follows:
- Detect a push to the master branch of Discaper on GitHub
- Clone from GitHub onto the BuildKite agent
- Build the project: Run
npm ci && npm run build && npm run exportto create anoutfolder that contains all necessary files to deploy a NextJS app - read more about static NextJS exports here - Prepare the assets: Compress the contents of the
outfolder as atarfile then upload it as a BuildKite Artifact (so it can be downloaded and used in a proceeding BuildKite step) - Block the pipeline: have a step that requires me to press it before a deployment occurs. Read more about block steps here
- Deploy the assets: On block step click, download
tarfrom BuildKite artifacts and thenit to Discaper's VM (using SCP) where it'll be uncompressed and served!
Configuring Build Agent
First step is was to generate an SSH key. It was important to create this while logged in as the buildkite-agent user, on my agent I ran:
sudo su buildkite-agent
ssh-keygen
Then added it as a deploy key for Discaper (Discaper is a private GitHub repository).
Read more about GitHub Deploy keys here. If you're going to be adding multiple deploy keys, read more about how to do that in my other blog post: https://blog.harveydelaney.com/configuring-multiple-deploy-keys-on-github-for-your-vps/. You should also read BuildKite's documentation around adding SSH keys.
I also needed to setup NodeJS and NPM as we'd need this to build Discaper by following the steps here.
Creating the Build step
After adding a deploy key so that the Agent can clone the repository, I created a new Pipeline with Discaper's GitHub URL and added the script:
npm ci
npm run build
npm run export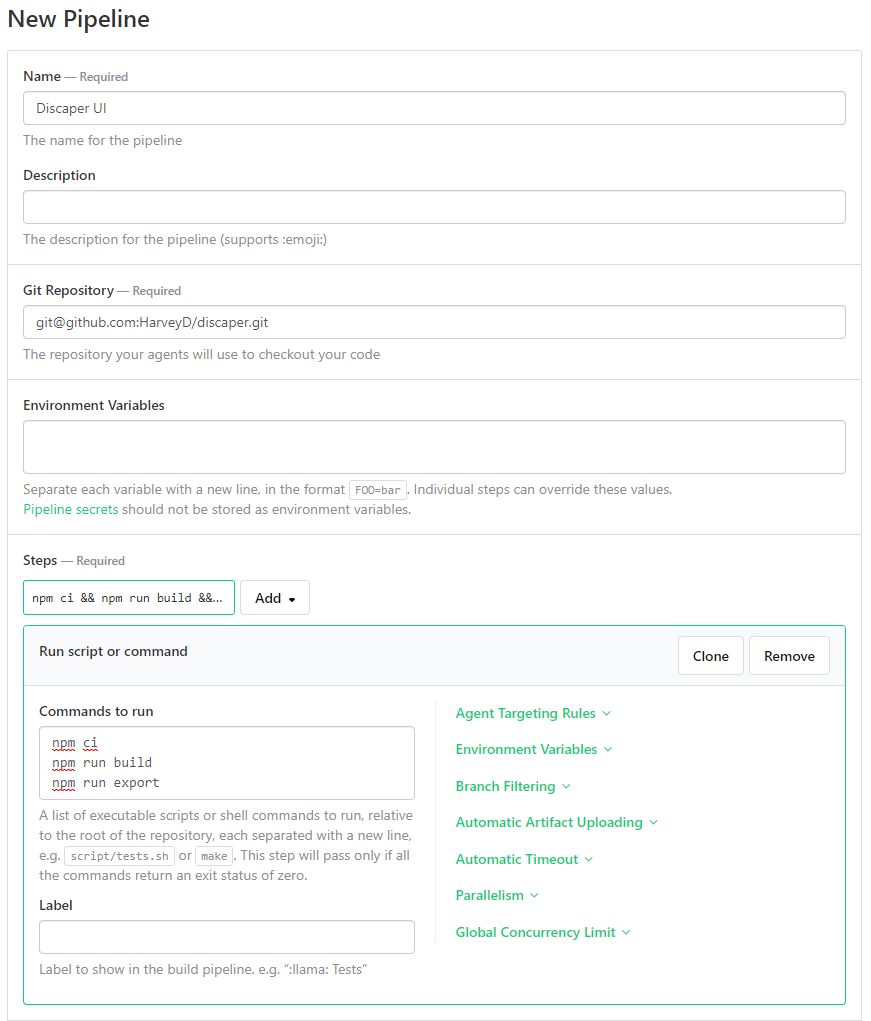
Automated GitHub Deployments
BuildKite then prompted me with a list of steps required to setup GitHub webhooks:
"Follow the instructions below to integrate Buildkite with your GitHub repository to automatically create new builds when you push new code."
After doing so, I went back to my BuildKite pipeline, it was already to perform the first build!

Since I just wanted to test if the agent worked, I created a small commit in Discaper and pushed it to GitHub. BuildKite knew there was a push event and triggered a new build. BuildKite ran the build commands, NextJS did it's magic and I got my first successful BuildKite build:

Uploading Artifacts
Now that my agent could clone the repository from GitHub and generate a successful build, I needed to compress and package the contents of the out folder, then tell BuildKite to upload the tar file to it's artifacts and block the pipeline.
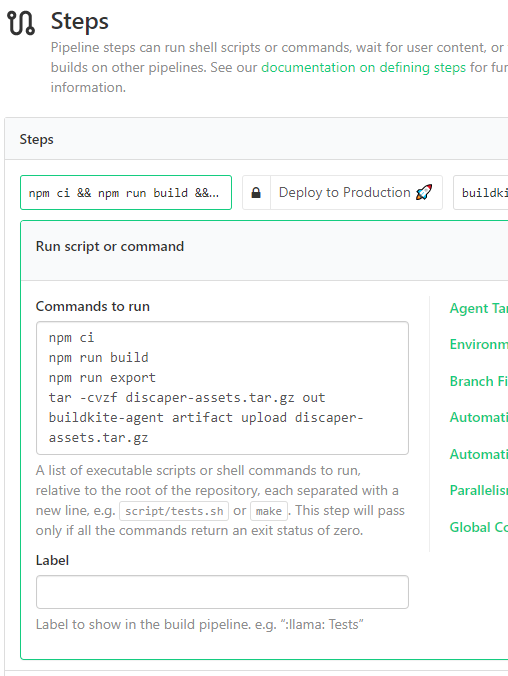
To upload artifacts, I went back to Discaper's Pipeline Settings and added the following command to my step:
buildkite-agent artifact upload discaper-assets.tar.gz This tells BuildKite to upload discaper-assets.tar.gz at the very end of the step, read more about how BuildKite Artifacts work here:
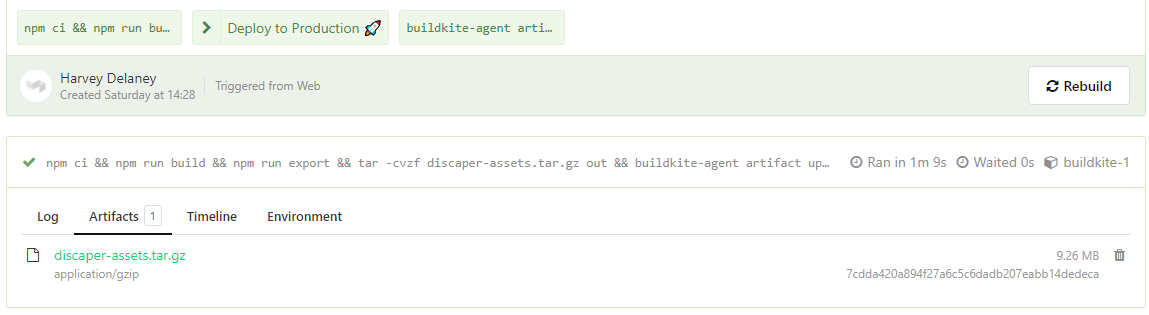
To test this out, I simply triggered another build and could see that BuildKite uploaded all the files in out were compressed then uploaded to the pipeline's artifacts, which could be viewed in the Artifacts tab:
Block Step
Creating the block step from the BuildKite UI is trivial. I simply had to go into Pipeline Settings and add a new state, being Wait and block pipeline, I gave it the label: Deploy to Production along with a nice little rocket emoji:

Creating the Deploy step
My deploy step was relatively simple, although you may want to handle deploying assets in a different way. My strategy was to download discaper-assets.tar.gz, copy it over to my Discaper server, uncompress the tar file then serve the static files.
First, I created an additional step called Deploy to Production and told BuildKite to download discaper-assets.tar.gz, copy it over to my Discaper server and then execute a bash script on the server (that uncompressed the tar then re-runs the server with the new files copied 0ver):
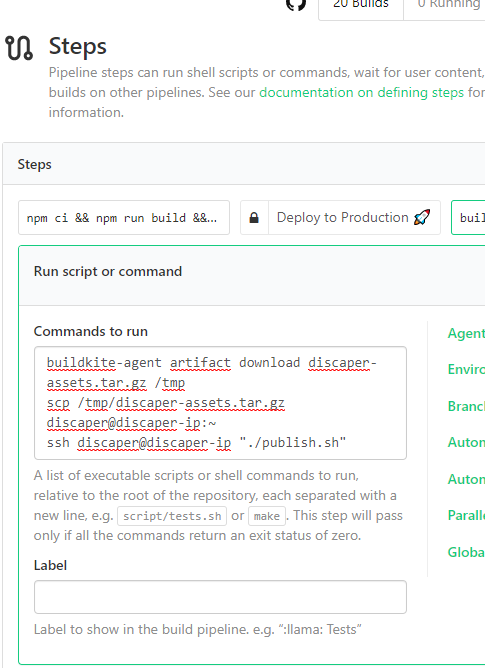
The commands in the screenshot are:
buildkite-agent artifact download discaper-assets.tar.gz /tmp
scp /tmp/discaper-assets.tar.gz discaper@discaper-ip:~
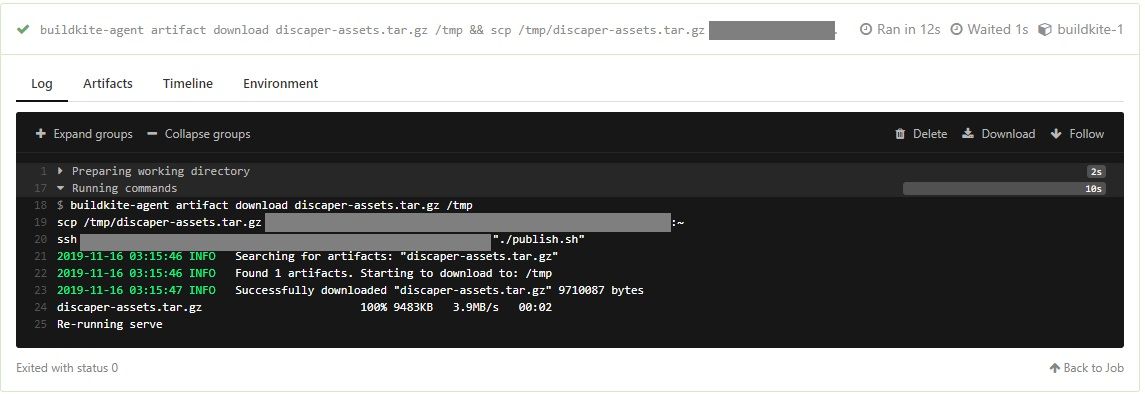
ssh discaper@discaper-ip "./publish.sh"Running this step in my Pipeline gives the output:
All Together
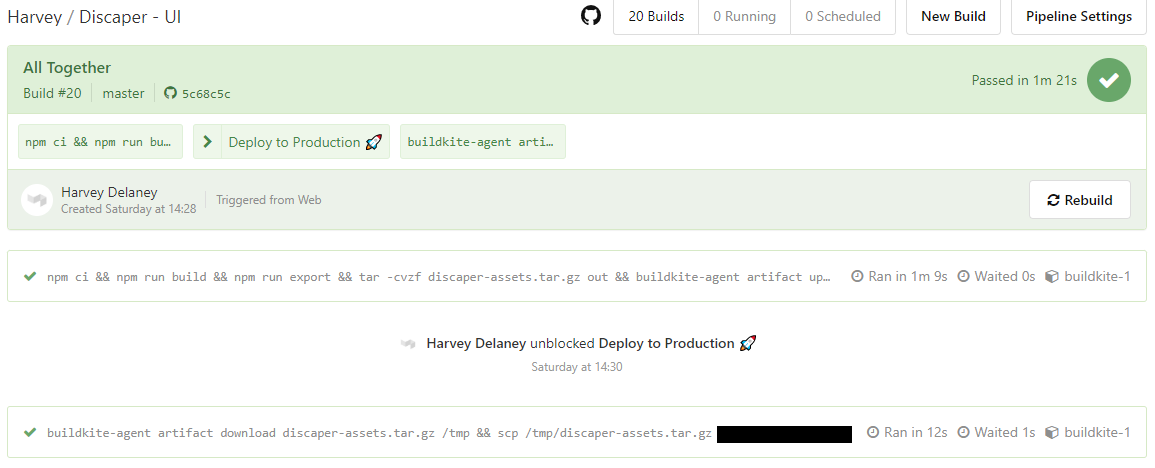
Hope this article helped you setup your first BuildKite pipeline. From here, you can (and should!) extend your pipeline to do more things like:
- Run linting/tests
- Deploy to to your test/staging environment
- Cleaning up environments